Showing posts with label Pattern. Show all posts

Wednesday, October 22, 2014

Day Of The Dead Sugar Skull Free Amigurumi Pattern

Sugar skulls are the most popular symbol of the Day Of The Dead (Dia de los Muertos in Spanish). It is a holiday for honoring those who have passed...and the perfect excuse to get hook and yarn in hand. Plus, my posting of patterns for Halloween is way overdue anyway.

I present to you, Martina, the Amigurumi Sugar Skull.

Day Of The Dead Sugar Skull Free Amigurumi Pattern - Geek With a Hook - GeekWithaHook.blogspot.com

Regardless if you celebrate this holiday or not, I hope you agree with me that Martina is seriously cute. And now you can make one too. Just don't call her Martina, 'coz this is THE Martina.

Day Of The Dead Sugar Skull Amigurumi

You will need:

  • Yarn in off white and black (or colors of your choice, I used soft worsted weight)
  • Crochet hook (I used size 4.0 mm or "F" for everything)
  • Tapestry needle
  • Scissors
  • Stuffing
  • Embroidery thread
  • Optional: buttons, other embellishments

Note: This pattern is worked in a spiral. Do not join rounds. Use a stitch marker to identify the beginning of the round and move it from round to round as you progress. Standard US abbreviations apply.

Skull (make 1)

With the off-white yarn:

Round 1: 6 sc into a magic ring. [6 sts]

Round 2: 2 sc in each st [12 sts]

Round 3: 1 sc, inc in next st. Repeat around. [18 sts]

Round 4: 2 sc, inc in next st. Repeat around. [24 sts]

Round 5: 3 sc, inc in next st. Repeat around. [30 sts]

Round 6: 4 sc, inc in next st. Repeat around. [36 sts]

Rounds 7-12: Sc around [36 sts]

Now begin shaping the head:

Round 13: 9 sc, dec over next 2 sts. *3 sc, dec over next 2 sts.* Repeat from * to * to the end of the round. [30 sts]

Round 14: 9 sc, dec over next 2 sts. *2 sc, dec over next 2 sts.* Repeat from * to * once more. 5 sc, dec over next 2 sts. Repeat from * to * once. [25 sts]

Round 15: 9 sc, dec over next 2 sts. *1 sc, dec over next 2 sts.* Repeat from * to * once more. Dec over next 2 sts. Repeat from * to * twice. [19 sts]

Stuff firmly.

Round 16: 9 sc, *dec over the next 2 sts.* Repeat from * to * to the end of the round. [14 sts]

Round 17-18: Sc around [14 sts]

Round 19: Dec around using only the back loops. [7 sts]

Cut yarn, leaving a tail about 6 inches long, and pull through. Add more stuffing if you like (difficult but doable). Thread a tapestry needle. Stitch through the front loop of every one of the 7 remaining sts. Pull the yarn to close the hole. Weave in ends.

Eyes (make 2) and Face


Day Of The Dead Sugar Skull Free Amigurumi Pattern - Geek With a Hook - GeekWithaHook.blogspot.com

With the black yarn: 10 dc into magic ring. Finish off, leaving a tail to sew onto the head. Alternatively, you could weave in the ends and sew them onto the head using embroidery thread, which is what I did. You could also glue them on, your choice.

For a more colorful touch, sew on (or glue) buttons on the eyes before attaching them to the head.

Use embroidery thread to make the mouth and the nose.

Now pick a gender, or go genderless, and decorate your newly Crocheted Sugar Skull Amigurumi. Go crazy embroidering with colorful thread as you want, like I did on Martina's cheeks with yellow and orange swirls and a purple "something" on her forehead. Then I made the following flower for her.

Flower (optional, I made 1)


Day Of The Dead Sugar Skull Free Amigurumi Pattern - Geek With a Hook - GeekWithaHook.blogspot.com

I followed the following pattern from user Creative Crochet on YouTube. Very well explained and easy to follow. It is for a head band with a flower. I just followed her instructions for the flower, using my 4.0 mm ("F") hook, and made it with 6-petals, then added the leaves and a button for extra color.

This is the video for the Left-Handed version (flower instructions start at 7:26):


This is the video for the Right-Handed version (flower instructions start at 7:26):


Leaf (optional, I made 2)


Ch 7. Sc on second ch from hook. Hdc on next ch. Dc on next two ch. Hdc on next ch. Sc on last ch, then sl st on same st. Finish off, leaving a tail for sewing it onto the bottom of the flower.

Now attach the flower to the head using yarn, thread, or glue, your choice.

AND you are done ;)

Day Of The Dead Sugar Skull Free Amigurumi Pattern - Geek With a Hook - GeekWithaHook.blogspot.com

Don't forget to show me your creations!

XOXO

Friday, October 17, 2014

Solid Granny Square Pattern for Pixel Crochet (Right-Handed Version)

Solid Granny Square Pattern for Pixel Crochet - Right Handed Version - Geek With a Hook - GeekWithaHook.blogspot.com

This is the Red-Handed version of my Solid Granny Square Pattern for Pixel Crochet (Left-Handed Version here). I can't crochet right-handed, so I just flipped all my pictures, and here you have it.

In Pixel Crochet each pixel is represented by a crocheted square. Then you join all your squares together to create your, simply put, pixel awesomeness, which can take the form of a blanket, a rug, or whatever you want.

This Solid Granny Square pattern comes pretty darn close to a hole-less cutie with sharp corners. I call it "The Pixel Crochet Square," a mouthful...but, whatever. Call it "pixel," for short.

The Pixel Crochet Square (Right-Handed Version)

You will need:


Solid Granny Square Pattern for Pixel Crochet - Right Handed Version - Geek With a Hook - GeekWithaHook.blogspot.com

  • Yarn (I used worsted weight)
  • Crochet hook (I used size 6.00 mm or "J")
  • Tapestry needle
  • Scissors

I use Red Heart Super Saver yarn on my Pixel Crochet projects (lynch me if you want to). I find that size "J" (6.0 mm) gives me the best results with this yarn, with just the right tension. However, the "J" hook tends to be too thick for my taste when I use it with other softer worsted weight yarns. So, try this pattern with different combinations of hook sizes and types of worsted weight yarn to find the one that works best for your pixelation journey.

Round 1


Step 1:
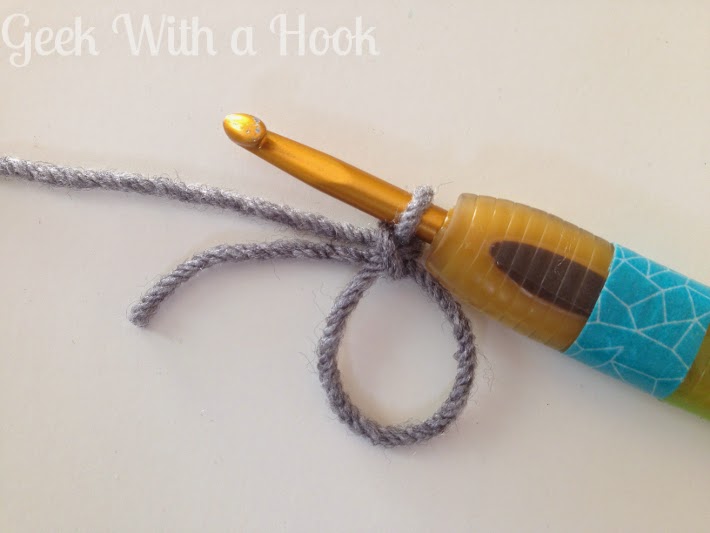
Make magic ring and lock it with a stitch.

Solid Granny Square Pattern for Pixel Crochet - Right Handed Version - Geek With a Hook - GeekWithaHook.blogspot.com

Step 2:
Ch 2 (counts as 1 dc), work 2 dc into ring, ch 1.

Solid Granny Square Pattern for Pixel Crochet - Right Handed Version - Geek With a Hook - GeekWithaHook.blogspot.com

Step 3:
Work 3 dc into ring, ch 1. Repeat twice.

Solid Granny Square Pattern for Pixel Crochet - Right Handed Version - Geek With a Hook - GeekWithaHook.blogspot.com

Step 4:
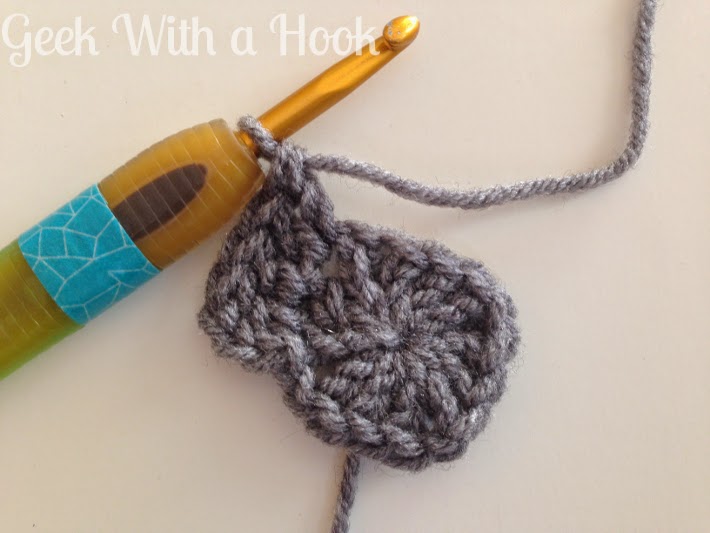
Pull tail to close the magic ring. Join to top of beg ch-2 with a sl st.

Solid Granny Square Pattern for Pixel Crochet - Right Handed Version - Geek With a Hook - GeekWithaHook.blogspot.com

Each side has a cluster with 3 dc each, separated by ch-1 spaces.

Round 2


Step 5:
Ch 3 (counts as 1 dc), 1 dc on same st as join.

Solid Granny Square Pattern for Pixel Crochet - Right Handed Version - Geek With a Hook - GeekWithaHook.blogspot.com

Step 6:
Work 1 dc in the middle st of the cluster, then 2 dc in last st of the cluster.

Solid Granny Square Pattern for Pixel Crochet - Right Handed Version - Geek With a Hook - GeekWithaHook.blogspot.com

Step 7:
Into the ch-1 space: work 1 tr, ch 1, 1tr.

Solid Granny Square Pattern for Pixel Crochet - Right Handed Version - Geek With a Hook - GeekWithaHook.blogspot.com

Step 8:
Work 2 dc in first st of the next cluster, then 1 dc in the middle st of the cluster, then 2 dc in last st of the cluster.

Solid Granny Square Pattern for Pixel Crochet - Right Handed Version - Geek With a Hook - GeekWithaHook.blogspot.com

Step 9:
Repeat step 7, step 8, and finish the round with a last repeat of step 7.

Solid Granny Square Pattern for Pixel Crochet - Right Handed Version - Geek With a Hook - GeekWithaHook.blogspot.com

If this is your last round, DO NOT JOIN just yet. Go to the "Finishing Off" section. Else, join to top of beg ch-3 with a sl st.

Up to this point, each side has a cluster that begins with 1 tr, followed by 5 dc, and ends with 1 tr. The clusters are separated by ch-1 spaces.

The square size with two rounds is about 3 in (before blocking).

Solid Granny Square Pattern for Pixel Crochet - Right Handed Version - Geek With a Hook - GeekWithaHook.blogspot.com

Additional Rounds:


Step 10:
First cluster of all subsequent rounds: start with a ch-3, work 1 dc in the same st as join, then work 1 dc in all sts before the last st of the cluster, then work 2 dc in the last st of the cluster.

Step 11:
Into the ch-1 space: work 1 tr, ch 1, 1tr. (Same as Step 7).

Step 12:
Remaining clusters of all subsequent rounds: work 2 dc in first st of the cluster, then work 1 dc in all sts before the last st of the cluster, then work 2 dc in the last st of the cluster.

Step 13:
Repeat step 11, step 12, and finish the round with a last repeat of step 11.

When you finish your last round, DO NOT JOIN just yet.

Finishing Off:


Cut the yarn, leaving a tail about 3 in long.

Solid Granny Square Pattern for Pixel Crochet - Right Handed Version - Geek With a Hook - GeekWithaHook.blogspot.com

Pull the tail up through the stitch.

Solid Granny Square Pattern for Pixel Crochet - Right Handed Version - Geek With a Hook - GeekWithaHook.blogspot.com

Thread a tapestry needle with the tail. Skip the top of beg ch-3 and create a joining stitch on the next st as follows:

Insert the tapestry needle under both loops of the st and draw the yarn through.

Solid Granny Square Pattern for Pixel Crochet - Right Handed Version - Geek With a Hook - GeekWithaHook.blogspot.com

Next, insert the tapestry needle in between the loops, from front to back, of the last stitch worked (which is a ch-1, btw) and draw the yarn through.

Solid Granny Square Pattern for Pixel Crochet - Right Handed Version - Geek With a Hook - GeekWithaHook.blogspot.com

Weave in the tails and cut.

Solid Granny Square Pattern for Pixel Crochet - Right Handed Version - Geek With a Hook - GeekWithaHook.blogspot.com

Now make as many "pixels" as you need :) I'll soon post projects I've made using this pattern.

Don't forget to show me your creations!

XOXO

Tuesday, October 14, 2014

Solid Granny Square Pattern for Pixel Crochet (Left-Handed Version)

Solid Granny Square Pattern for Pixel Crochet - Left Handed Version - Geek With a Hook - GeekWithaHook.blogspot.com

In Pixel Crochet each pixel is represented by a crocheted square. Then you join all your squares together to create your, simply put, pixel awesomeness, which can take the form of a blanket, a rug, or whatever you want.

This Solid Granny Square pattern comes pretty darn close to a hole-less cutie with sharp corners. I call it "The Pixel Crochet Square", a mouthful...but, whatever. Call it "pixel," for short.

Oh, and since I'm a leftie, the left-handed version is the one I publish first :P Go see the right-handed version here.

The Pixel Crochet Square (Left-Handed Version)

You will need:


Solid Granny Square Pattern for Pixel Crochet - Left Handed Version - Geek With a Hook - GeekWithaHook.blogspot.com
  • Yarn (I used worsted weight)
  • Crochet hook (I used size 6.00 mm or "J")
  • Tapestry needle
  • Scissors

I use Red Heart Super Saver yarn on my Pixel Crochet projects (lynch me if you want to). I find that size "J" (6.0 mm) gives me the best results with this yarn, with just the right tension. However, the "J" hook tends to be too thick for my taste when I use it with other softer worsted weight yarns. So, try this pattern with different combinations of hook sizes and types of worsted weight yarn to find the one that works best for your pixelation journey.

Round 1


Step 1:
Make magic ring and lock it with a stitch.

Solid Granny Square Pattern for Pixel Crochet - Left Handed Version - Geek With a Hook - GeekWithaHook.blogspot.com

Step 2:
Ch 2 (counts as 1 dc), work 2 dc into ring, ch 1.

Solid Granny Square Pattern for Pixel Crochet - Left Handed Version - Geek With a Hook - GeekWithaHook.blogspot.com

Step 3:
Work 3 dc into ring, ch 1. Repeat twice.

Solid Granny Square Pattern for Pixel Crochet - Left Handed Version - Geek With a Hook - GeekWithaHook.blogspot.com

Step 4:
Pull tail to close the magic ring. Join to top of beg ch-2 with a sl st.

Solid Granny Square Pattern for Pixel Crochet - Left Handed Version - Geek With a Hook - GeekWithaHook.blogspot.com

Each side has a cluster with 3 dc each, separated by ch-1 spaces.

Round 2


Step 5:
Ch 3 (counts as 1 dc), 1 dc on same st as join.

Solid Granny Square Pattern for Pixel Crochet - Left Handed Version - Geek With a Hook - GeekWithaHook.blogspot.com

Step 6:
Work 1 dc in the middle st of the cluster, then 2 dc in last st of the cluster.

Solid Granny Square Pattern for Pixel Crochet - Left Handed Version - Geek With a Hook - GeekWithaHook.blogspot.com

Step 7:
Into the ch-1 space: work 1 tr, ch 1, 1tr.

Solid Granny Square Pattern for Pixel Crochet - Left Handed Version - Geek With a Hook - GeekWithaHook.blogspot.com

Step 8:
Work 2 dc in first st of the next cluster, then 1 dc in the middle st of the cluster, then 2 dc in last st of the cluster.

Solid Granny Square Pattern for Pixel Crochet - Left Handed Version - Geek With a Hook - GeekWithaHook.blogspot.com

Step 9:
Repeat step 7, step 8, and finish the round with a last repeat of step 7.

Solid Granny Square Pattern for Pixel Crochet - Left Handed Version - Geek With a Hook - GeekWithaHook.blogspot.com

If this is your last round, DO NOT JOIN just yet. Go to the "Finishing Off" section. Else, join to top of beg ch-3 with a sl st.

Up to this point, each side has a cluster that begins with 1 tr, followed by 5 dc, and ends with 1 tr. The clusters are separated by ch-1 spaces.

The square size with two rounds is about 3 in (before blocking).

Solid Granny Square Pattern for Pixel Crochet - Left Handed Version - Geek With a Hook - GeekWithaHook.blogspot.com

Additional Rounds:


Step 10:
First cluster of all subsequent rounds: start with a ch-3, work 1 dc in the same st as join, then work 1 dc in all sts before the last st of the cluster, then work 2 dc in the last st of the cluster.

Step 11:
Into the ch-1 space: work 1 tr, ch 1, 1tr. (Same as Step 7).

Step 12:
Remaining clusters of all subsequent rounds: work 2 dc in first st of the cluster, then work 1 dc in all sts before the last st of the cluster, then work 2 dc in the last st of the cluster.

Step 13:
Repeat step 11, step 12, and finish the round with a last repeat of step 11.

When you finish your last round, DO NOT JOIN just yet.

Finishing Off:


Cut the yarn, leaving a tail about 3 in long.

Solid Granny Square Pattern for Pixel Crochet - Left Handed Version - Geek With a Hook - GeekWithaHook.blogspot.com

Pull the tail up through the stitch.

Solid Granny Square Pattern for Pixel Crochet - Left Handed Version - Geek With a Hook - GeekWithaHook.blogspot.com

Thread a tapestry needle with the tail. Skip the top of beg ch-3 and create a joining stitch on the next st as follows:

Insert the tapestry needle under both loops of the st and draw the yarn through.

Solid Granny Square Pattern for Pixel Crochet - Left Handed Version - Geek With a Hook - GeekWithaHook.blogspot.com

Next, insert the tapestry needle in between the loops, from front to back, of the last stitch worked (which is a ch-1, btw) and draw the yarn through.

Solid Granny Square Pattern for Pixel Crochet - Left Handed Version - Geek With a Hook - GeekWithaHook.blogspot.com

Weave in the tails and cut.

Solid Granny Square Pattern for Pixel Crochet - Left Handed Version - Geek With a Hook - GeekWithaHook.blogspot.com

Now make as many "pixels" as you need :) I'll soon post projects I've made using this pattern.

Don't forget to show me your creations!

XOXO